How To Temporarily Disable Your Backspace Key

The PowerToys v.0.25.0 version is the first one where the disable key feature was introduced, it means that it supports the biggest range of operating systems. 
Here’s how to install it.
1. Click here to access its website location
2. Scroll down and click on the asset specified in the screenshot below. The download should start

Now what are the steps in its installation process?

2. Install PowerToys

Note: Before you install, if you have any doubt as to whether this file is safe, you may run it through virustotal.com to check it for viruses (Even though it’s distributed by microsoft). You simply need to click “Choose file” in the website and choose the downloaded .exe file from its destination folder.

Now let’s get to installing. Here are the steps:
1. Double click “PowerToysSetup-0.25.0-x64”. It is located in My Computer/Downloads by default.

2. Click “Run”

3. Click “Next”

4. Read the License or Not 😀 and Click “Next”

5. You may change the destination folder or leave as default (C:\Program Files\PowerToys\)
Check the First option 
Uncheck
the Second option
My suggestion to you is to not run it on log-on because it may consume computer resources if you don’t need it 
and have a desktop shortcut for quick access.

6. Click “Install”

7. After clicking install you will be asked for permission to allow the program to make changes to the computer, click “Yes”

8. Click “Finish”

Now how should you disable it inside the software itself?

3. Disabling Backspace Inside PowerToys

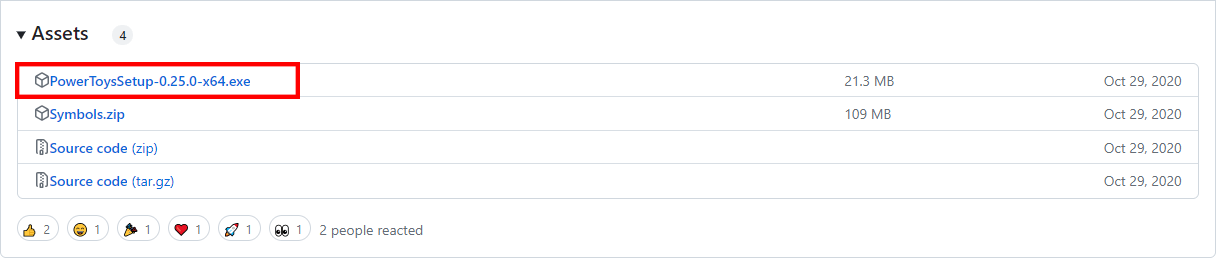
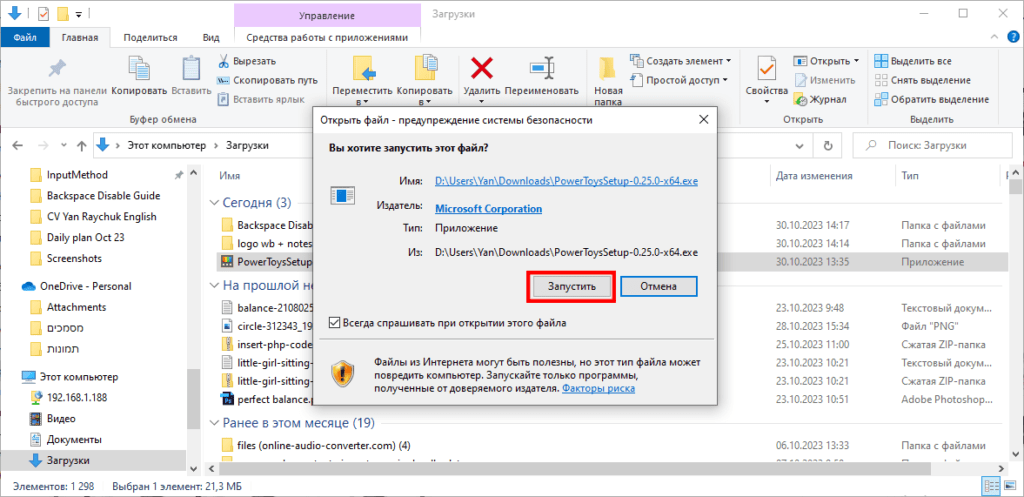
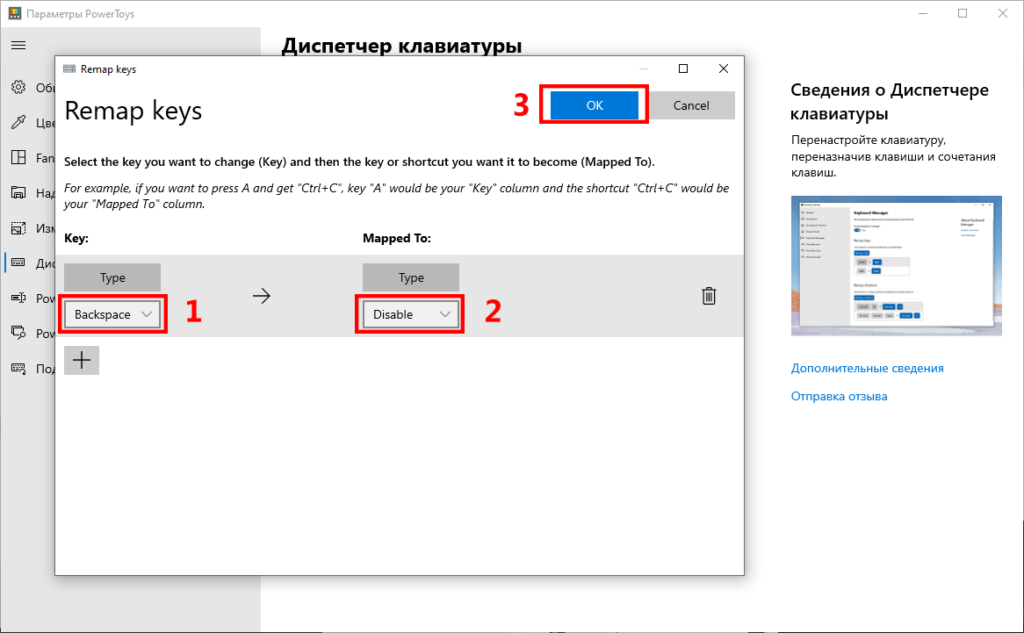
Note: Before you launch the program you may run it through VirusTotal again, but again remember that the company that issued this program is Microsoft. (Looking back, I even see one anti-virus out of 71 showing some sort of trojan in it in VirusTotal, but I don’t mind, since I know it comes directly from Microsoft) 

1. If you chose create a desktop shortcut during the installation, double-click the “PowerToys” shortcut on your desktop

2. Click the small arrow next to your computer clock
3. Click the PowerToys Icon

4. Click “Keyboard Manager”

5. Click “Remap a Key” (In case your “Keyboard Manager” is turned off you may need to click the blue slide button below the text “Turn on Keyboard Manager”)

6. Click the “+” button

7. Click the arrow below the “Key Column and choose “Backspace” from the list
8. Click the arrow below the Mapped To Column and choose Disable from the list
9. Click “Ok”

10. Click “Continue Anyway”

4. How to reverse this and a few notes

Reversing it is pretty simple.
1. Click the “Trash” symbol. The line should disappear
2. Click “Ok”

Two Ways To Remove With Backspace Off

If you still want to remove text when backspace is disabled you may do that by
Way 1: highlighting the text with the mouse and just pressing any key to overwrite it
Way 2: highlighting the text with the mouse and hitting the delete key.

What? I may still remove text?

What is the point to go through all this if you may still remove?
That is because you are probably used to using the backspace, and it will require conscious effort to use another key in order to delete, and after you went through all this to disable it, the momentum will make it a lot less likely that you actually make the additional effort.

Liked this guide?
You may also appreciate the How to Write a Good Ad – 5 Fundamentals Workbook for content creators which you may get here below.

Was this article helpful?

Leave a comment

Your email address will not be published. Required fields are marked *